Posts mit dem Label SharePoint Online werden angezeigt. Alle Posts anzeigen

Freitag, 21. Februar 2020

Move to modern experience in SharePoint and what you need to know about it

Modern experience in SharePoint

Microsoft offers a good overview about all topics in this context on this website: https://docs.microsoft.com/en-us/sharepoint/guide-to-sharepoint-modern-experience This article is structured with the following headlines: Information architecture and hub sites, Navigation, Branding, Publishing, Search, Sharing and permissions.
I already posted about some of these topics:

Other topics:
  • Navigation: The “inherited” navigation feature in classic SharePoint site is not available in the modern experience. Hub sites provide another way to achieve cross-site navigation previously available in managed navigation and site hierarchies in classic SharePoint. 
  • Publishing: In the modern experience, Communication sites replace traditional publishing sites. Communication sites are easier to build and maintain, and include new features such as a modern authoring canvas. Also multilanguage capabilities will be available soon. They allow you to. To sum up: you can quickly create beautiful and responsive pages to share news, reports, statuses, and other information in a visually compelling format - all without heavy developer investment. You can get inspired with some great examples in the SharePoint Lookbook.
  • Search: SharePoint has both a classic and a modern search experience, where Microsoft search in SharePoint is the modern experience. Microsoft is actually in the middle of a transition from Classic Search to Microsoft Search. Because of this there are other differences, especially around customization. More details: When to use which search experienceThe most visible difference are:
    • Microsoft search box is placed in the header bar
    • Microsoft search is personal. The results you see are different from what other people see, even when you search for the same words
    • Search as you type: And you'll see results before you start typing in the search box, based on your previous activity and trending content in Office 365

Modernize your root site

A root site, f.e. https://contoso.sharepoint.com, which is set up before April 2019 was created as a classic team site. Now, a communication site is set up as the root site for new organizations. If your Office 365 Tenant was created before April 2019, you can modernize your root site with one of these scenarios:
  • Replace the root site with a new site: If you already have a site that you want to use as your root site, or if you want to use a modern team site, replace (swap) the root site with it. This scenario is very useful if you plan to create a new site and let the old one live until you are ready. We can use the new SharePoint admin center to replace the root site. Select your root site (f.e. https://contoso.sharepoint.com) in the Active Sites menu in SharePoint Online Admin Center. Doing this you get the “Replace site” button in the menu:
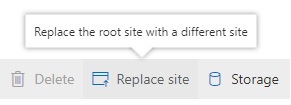
Selecting this you get the following dialog:
And we can also use PowerShell to do the swap. Powershell offers the capability to manually set the url for the archive url and some further parameter:
Invoke-SPOSiteSwap
         -SourceUrl <string>
         -TargetUrl <string>
         -ArchiveUrl <string>
         [-DisableRedirection]  
      [<CommonParameters>]
  • Use the root site as it is but with a modern experience: If you want the content on your classic root site as it is but want to have the layout of a communication site, apply the communication site experience to the root site. This feature isn't available yet but is coming soon.
  • Continue using the classic team site but with modern pages library and a modern home page: If you want to continue using the classic team site, enable the modern site pages library experience and set a modern page as the home page of the root site. This gives users a modern team site experience with the left navigation.

Things to think about

Before you begin, make sure that…:
  • If you have "Featured links" on the SharePoint start page. You'll need to add them again after you replace the root site.
  • Review your source site about policies, permissions, and external sharing settings

Limitations:
You can use the following as a new root site:
    • Communication site (SITEPAGEPUBLISHING#0)
    • Modern team site that isn't connected to an Office 365 group (STS#3) | The root site can't be connected to an Office 365 group.
    • Classic team site (STS#0).

When plan to do a site swap the root site and the new site can't be hub sites or associated with a hub. You need to unregister it as a hub site, replace the root site, and then register it as a hub site again.

Dienstag, 29. Januar 2019

Coaching your users through the External Sharing Experience

If your organization is sharing documents or collaborating directly with vendors, clients, or customers, then you can use the external sharing features and guest access in Office 365 to support this. Or, if this is not the case, you may want to limit the use of external collaboration in your organization.
Note that external sharing is turned on by default for your entire Office 365 environment. Every user can invite external people to Groups, Teams and SharePoint sites and can share content using OneDrive for Business. You may want to turn it off globally until you know exactly how you want to use the feature.
Poorly there is no mater switch to turn external sharing and inviting external user ON or OFF globally. We need to configure it per service and there are also cross sites effects between the services.

Settings overview


External sharing overview

Content Level

When sharing a SharePoint site with an authenticated external user, an invitation is sent to them via email which contains a link to the site. During the login process they are asked to log in using the username and password of their Microsoft account or their work or school account. If the login is successful, the account is added to the Azure AD associated to the Office 365 subscription. The account is added with #EXT# in the user name.
An external user did not need to have a license. To discontinue sharing with an authenticated external user, remove the permissions from the site or delete the user in the Azure AD.
If you share a file or folder with an external user, this user gets an email with a link to the file or folder. The user gets a time-sensitive code via email that he can use to verify his identity. Once he proved his identity by using the code the user is added as a external user in the Azure AD and he can access the file using his account. Sharing a file or folder with a user that did not have a Microsoft account or work or school account this user needs to use the code every time to access the shared content.
To discontinue sharing with an authenticated external user you can delete the sharing link that was sent to him.
To share with anonymous users, you can set several options:
  • Edit, view or upload to a folder
  • Set link to expire at a specified time
  • Block download

The (external) user will receive a E-Mail with the link to the file or folder.
Anonymous users are not added to the Azure AD. To discontinue sharing you need to delete the anonymous link.

Collaboration Level

Guest access on the collaboration level is included with all Office 365 Business Premium, Office 365 Enterprise, and Office 365 Education subscriptions. No additional licensing for the guest users is requirement. You can have up to 5 guests per licensed user on your tenant. For more information about licensing, see Azure Active Directory B2B collaboration licensing guidance.

Office 365 Groups

To collaborate with external users in your Office 365 Group this feature must be activated as showed in the table above. By default, guest access is turned on in Office 365. That means, that everyone in your organization can add external users to an Office 365 Group. When an external user is invited to join a group, he receives an invitation email. The external user will have access to the following Office 365 Group features:
  • Conversations: Externals did not get access to the conversation history, but they will become part of the Office 365 Group distribution list.
  • Notebook: Externals get access to OneNote
  • Calendar: No access, but they receive calendar invitations
  • SharePoint Team Site: Externals get access to the SharePoint Team Site
  • Planner: To access a plan, guests either need to use a specific plan URL or go to https://tasks.office.com/%organizationdomainname%

Microsoft Teams

Because of Microsoft Teams is using services like SharePoint Online etc. the external access configuration belongs on the settings in you tenant.
Each level controls the guest access as shown:
  • Azure Active Directory: External access in Microsoft Teams relies on Azure AD.
  • Microsoft Teams: Controls external access in Microsoft Teams.
  • Office 365 Groups: Controls external access in Office 365 Groups and Microsoft Teams.
  • SharePoint Online and OneDrive for Business: Controls external access in SharePoint Online and OneDrive for Business.

Advanced

Office 365 inter-tenant collaboration

We have several options to collaborate between two Office 365 tenants. Based on Azure Active Directory B2B we can set up collaboration for nearly all Office 365 services. Details are described in this Microsoft article: Office 365 inter-tenant collaboration

Tenant restrictions

Tenant restrictions enables you to control access to other Office 365 tenants. Tenant restrictions gives organizations the ability to specify the list of tenants that their users are permitted to access. Details, pre-requirements and limitations are described in this Microsoft article: Use Tenant Restrictions to manage access to SaaS cloud applications

Office 365 user vs. Windows Live ID

Anyone with a Microsoft work or school account or a consumer email account, such as Outlook, Gmail, or others, can participate as a guest in Office 365.

If a user has an Office 365 hosted E-Mail address, he will automatically have a work or school account created by his IT department. This account original exists in an Azure AD.
If a user does not have a work or school account, he can use a LiveID. To get one the user needs to go to the Microsoft account sign-in page: https://account.microsoft.com/. In the upper right corner select “Login” and then select “No account”. He needs to fill out the form and create a password. Details see below in “Coaching your (guest) users through the External Sharing Experience” The LiveID is original hosted by Microsoft.

Coaching your (guest) users through the External Sharing Experience

Content Level

IF you are inviting an external user to a SharePoint site or added him to a SharePoint group, he will receive an invitation E-Mail:
The link in the email will point the user to a website asking him what type of account he has:
If the user enters his email but did not have a Microsoft account, he will see the following dialog:
Click “Create One!” to register a new Microsoft account:
Set a password:
Provide your details:

Microsoft will send a code to verify the email address:
If a file or folder in SharePoint or OneDrive for Business is shared to an external user and the user did not already exists in the Azure AD, he will also need to verify his E-Mail address:
Sharing a file or folder with a user that did not have a Microsoft work or school account this user needs to use the code every time to access the shared content.

Collaboration Level

When an external user is invited to a group, he receives an E-Mail:
External member's can join conversations through their inbox and receive calendar invitations.
When an external user is invited to a group, he also receives an E-Mail with the details:

Mittwoch, 8. August 2018

Summary about Modern Team Sites, Communication Sites & Hub Sites


Modern Team Sites, Communication Sites & Hub Sites

Modern Team Sites, Communication Sites & Hub Sites are available in SharePoint Online and SharePoint 2019. A modern Site is created from the SharePoint Home App:

Common Stuff

In modern Sites we have a bunch of new Webparts:

One of the initial questions is about using a modern Team Site or a Communication Site. At the end it all about the focus of the site and the question about the usecase for this site. Susan Hanley provides a brilliant overview and matrix to find out what is best for your scenario:
In addition, Mark Kashman also provides a good overview picture about modern Team Site and Communication Site:

Modern Team Site

About Modern Team Site:
  • Focus: Connect, Collaborate, Create
  • Connected to O365 Groups: Creates group email address
  • Privacy settings: Private by default and can be changed to public


In modern Sites we have a so called “New” Dropdown to easy create new objects:
It is also very easy to modify the Quick Launch Navigation based on the modern canvas:

A new feature for modern Team Sites is the Site Info Hover Panel. You can access this panel by mouseover the Site name:

The panel gives you an overview about the site and direct links to the associated resources like the Planer, the Group Calendar etc.


Communication Site

About Communication Sites:
  • Fokus: Showcase, Share Services, Story (broadcast information)
  • 3 different type of a Communication Site are available out-of-the-box:
    • Topic: Designed to present large amount of information such as news, events and other content
    • Showcase: Designed to showcase a product, team, or event using images
    • Blank: Start from scratch


Modern Sites Pros and Cons

Pro:
  • Easy to use
  • Modern canvas
  • Modern branding & responsive design
  • Modern Web Parts
  • Easy to use/configure web parts
  • Connected to a Group
  • Extend using the SharePoint Framework

Contra:
  • Only created as a site collection and no modern sub-sites available
  • No variations until now
  • No extensibility for modern search until now
  • Not all Lists, Libraries and website types have a modern design already (Blogs, Tasks, Calendars, Discussions)
Complete list and further details: http://www.sharepointtalk.net/2018/08/things-to-think-about-when-moving-from.html


Things to think about when moving from classic to modern SharePoint Site
Moving from classic SharePoint Online Sites or from SharePoint on-prem Sites to modern Sites sound easy but can get tricky. There are several pros and cons coming from classic Sites and now plan to use modern Sites. The following to table shows the pros and cons and the topics you have to think about when planning a migration:


Hub Sites

Common info about Hib Sites:
  • Linked sites
  • Consistent branding across all sites
  • Top navigation
  • Search within the hub site will also search all linked sites.
  • Aggregate news from linked sites. This can take 5–15 minutes.
  • Flexible attach & detach a site from a hub
  • Sites can only be associated with one hub site.
  • Hubs can’t be nested
  • Limited to 50 hub sites
  • Association with a hub does not change the permissions on a site
  • A site can only be associate with one hub


Webparts for Hub Sites:
  • News roll-up: News published on a hub site and on any associated sites is automatically aggregated and shown on the home page of the hub site.
  • Associated sites: Display the most active sites associated with the hub site.
  • Highlighted content: Use the Highlighted content web part to dynamically display content from sites associated with the hub.


Admin Stuff

Manage site creation in SharePoint Online Admin:


Subsite Creation in SharePoint Online Admin:

Office 365 Groups Connection Setting in SharePoint Online Admin:

To allow only specific users to create groups, use the PowerShell cmdlet GroupCreationAllowedGroupId or change setting in Azure AD

Connect to a new office 365 group:
Ability to connect existing SharePoint team sites to Office 365 Groups is coming later this year


Branding SharePoint Modern Sites

Out of the box themes, configuration option and custom site themes:
  • The following predefined themes are available by default: Blue, Orange, Red, Purple, Green, Gray, Dark Yellow, Dark Blue
  • Each theme can be customized by selecting “Customize theme”
  • Custom themes can be created and uploaded. To create a custom theme a online theme generator tool is available: https://developer.microsoft.com/en-us/fabric#/styles/themegenerator
  • Classic themes can still be used by choosing the link under the modern themes listed.
    • Because the modern SharePoint UI differs from the classic UI, however, some limitations apply when you use classic themes with modern pages.

Themes are defined in a JSON schema that stores color settings and related metadata for each theme. These capabilities are available to administrators via PowerShell cmdlets, and to developers via the SharePoint client-side object model (CSOM) or the SharePoint REST API.


PNP Starter Kit & Fantastic 40 Web Parts

What is the SharePoint Starter Kit:
  • SharePoint Starter Kit demonstrates how you can extend modern sites.
  • Currently included in the package:
    • Tenant level provisioning logic using PnP Provisioning Engine
    • 3 site collections. One assigned to be a hub site and two associate to the hub site automatically from the provisioning script
    • Contoso Site Designs for group associated team site and communication site
    • 17 client-side web parts demonstrating different capabilities
    • 7 SharePoint Framework extensions
    • Sample LOB service to be hosted in Azure
    • Sample content on the portal to demonstrate news and article capabilities
Source and further details: https://github.com/SharePoint/sp-starter-kit

What is the Fantastic 40 Web Parts:
It is a sample kit of 40 web parts for example visual web parts as carousel, images galleries, custom editors, polls, charts, map, animations, etc. These web parts are free and open source. The webparts are available: English, French, Spanish, German. IMPORTANT NOTE: These web parts are not officially supported by Microsoft.

Montag, 6. August 2018

Things to think about when moving from classic to modern SharePoint Site


Moving from classic SharePoint Online Sites or from SharePoint on-prem Sites to modern Sites sound easy but can get tricky. There are several pros and cons coming from classic Sites and now plan to use modern Sites. Also, some features that we know from classic sites are no longer available in modern Sites. In addition, some features we have in SharePoint on-prem are deprecated in SharePoint online. This is also a topic to think about when planning a migration.
The following to tables showing the pros and cons and the topics you have to think about when planning a migration:

Pros and Cons about modern Sites focusing a migration scenario

Mapping of deprecated / new features und functions


Sonntag, 18. Februar 2018

What comes next is the future – Microsoft Prognosis 2018

The new year just started. Highest time to look at what 2018 will bring our way in the Microsoft ecosystem
This article covers:
  • Hot topics and trends 2018
  • Trend topics around collaboration and communication
  • Teams will replace SharePoint as frontend in many places
  • The renaissance of email
  • AI, Machine Learning & Bots
  • Is Hybrid the new on-prem?
  • It has never been easier and more economical to integrate external users
  • GDPR is coming
  • Office 365, Dynamics 365, Bing for Business, LinkedIn and where else the journey is heading
Download the English version of the article for free: LINK

Das Jahr 2018 ist bereits einige Tage alt. Höchste Zeit, sich anzuschauen, was es im Microsoft Ökosystem tut.
Themen:
  • Hot Topics und Trends 2018
  • Trendthemen rund um Kollaboration und Kommunikation
  • Teams wird SharePoint als Frontend an vielen Stellen ablösen
  • Renaissance der Email
  • AI, Mashine Learning & Bots
  • Ist das Hybrid das neue on-prem?
  • Nie war es einfacher und kostengünstiger Externe zu integrieren
  • Die DSGVO kommt
  • Office 365, Dynamics 365, Bing for Business, Linked und wohin die Reise noch gehen wird

Kostenloser Download der Deutschen Version des Artikels: LINK
(Eine online Version des Artikels gibt es auch hier: Teil1 | Teil 2)

Samstag, 9. September 2017

Using site classification for SharePoint Sites

Site classification is a must-have when we talk about Governance, Compliance and also topics around GDPR.
Beside 3rd party solutions focusing on site and content classification we have also some out of the box options and developer opportunities in Office 365 and SharePoint on-prem. Depending on if we are talking about classic SharePoint Site Collections or if we talk about modem Team Sites, being part of an Office 365 Group, we have different szenarios.

To create a new SharePoint site in Office 365 we know two different ways.

  1. We can create a SharePoint Online Site using the SharePoint Online Administration. This will create a SharePoint Site based on WebTemplate STS
  2. We can go to SharePoint Home and click “create” in the upper left corner or we can go to Outlook Online and create a new Group. Both will create a SharePoint Site based on WebTemplate GROUP
To provide a site classification solution for classic Team Sites created by option 1 we need to implement the following: Implement a SharePoint site classification solution. This works also for SharePoint 2013 on-prem. The article describes a full solution including policies for site closing and deletion depending on the classification setting. As you can see the article describes some steps to do:
  • Define and set site policies
  • Insert a custom action
  • Custom site classification
  • Add a classification indicator to site page
Using the opportunities we have with Groups and Group Policies some of these things can be automatically put to a SharePoint Site based on WebTemplate GROUP.
This video by Vesa Juvonen is showing the steps and the final results:
As you can see we need to create the site bases on option 2.
(Dialogs already including policies)
SharePoint Home - Create:
Outlook Online -> Create Group:

Final result:

Step by Step

To enable this functionality in Office 365 we need to set up an “Settings Object” and a “Settings Template” in Azure AD. To do this we can use the Azure Active Directory cmdlets for configuring group settings.

First of all we need to install the preview of Azure Active Directory V2 PowerShell Module:

Install-Module -Name AzureADPreview

To set up the site classification options and configure properties like ClassificationList and ClassificationDescriptions etc follow these steps also shown in Vesas video:

#Connect
Connect-AzureAD
Get-AzureADDirectorySettingTemplate

#Create
$Template = Get-AzureADDirectorySettingTemplate -Id 62375ab9-6b52-47ed-826b-58e47e0e304b
$Setting = $template.CreateDirectorySetting()
$setting["UsageGuidelinesUrl"] = "http://sharepointtalk.com"
$setting["ClassificationList"] = "Public, Internal, TopSecret"
$setting["DefaultClassification"] = "TopSecret"
$setting["ClassificationDescriptions"] = "Public:no restrictions,Internal:all internal users can access,TopSecret:only special users can access"
$setting["GuestUsageGuidelinesUrl"] = "http://sharepointtalk.net"
New-AzureADDirectorySetting -DirectorySetting $setting

#Check
Get-AzureADDirectorySetting -All $True
(Get-AzureADDirectorySetting -Id %%YOUR ID%%).values

As described in the video we can now use the CLASSIFICATION property to assign a site policy or any other custom action. Details about site policies are part of Implement a SharePoint site classification solution.

Here the script taken from the video to get the CLASSIFICATION property:

#Get PnP PowerShellOnline
Install-Module SharePointPnPPowerShellOnline
#Get Site classfication value
Connect-PnPOnline https://%YOUR TENANT%.sharepoint.com/sites/%YOUR SITE%
Get-PnPSite
$Site.Classification
Get-PnPProperty -ClientObject $Site -Property Classification

Sonntag, 30. Juli 2017

Overview of shared with Externals and shared Anonymous in Office 365

The GDPR highlights the need for protection of personal data held by organizations. To be able to do this Microsoft inverted a lot in new features and functions like the Office 365 Security & Compliance Center or the GDPR Assessment.
One of the backend systems helping to fulfill those regulations is the SharePoint Online Search Service. In the SharePoint Online Search schema, we can find two managed properties focusing on sharing and access from outside of your organization.
ViewableByExternalUsers and ViewableByAnonymousUsers
Both had the same setting: Query, Retrieve, Refine and Sort. So we can use them to create some reports based on search queries.

Personal overview

Office 365 let every user search in his SharePoint Online sites, OneDrive for Business files and also in Emails for content. In this scenario Email is of topic. But using this search function at the landing page of Office 365 a user can create a personal overview of content he shared to externals or anonymous.
To do this a user needs to fill in the following query in the search box at the Office 365 landing page:
ViewableByAnonymousUsers=true


In this example, I search for documents located in SharePoint Online sites or in my personal OneDrive for Business which are shared based on an anonymous guest link.
Using the query ViewableByExternalUsers=true shows me the files shared with external users through a sharing link that requires them to log in before they can view the file.
This gives a user an overview of documents he has shared from his OneDrive for Business with externals or anonymous. Because the URL is generic you can use this link for all your users and every user get his person overview: https://www.office.com/search?auth=2&home=1&q=ViewableByAnonymousUsers%3Dtrue
Also you can use this link to create a tile in the Office 365 App Launcher as described in the article: Add custom tiles to the app launcher
The result may look like this:

Team Site overview

Microsoft integrated a new out the box reporting capability in every Team Site. The article: View usage data for your SharePoint Online site is showing all details you need to know. There is also a new tab called “Shared externally”.
The article says: List of files you have access to that have been shared with users outside your organization through a sharing link that requires them to log in before they can view the file. Files shared with anonymous users or files available to users with guest permissions are not included.
To get a list of files shared anonymous in this Team Site we can again use the query: ViewableByAnonymousUsers=true followed by a path filter like for example: path:https:\\yourTeamSiteName.sharepoint.com.

Using Search Center to get an overview

As an administrator, you can also use the search center to get an overview of anonymous shared content or about data and also SharePoint Online Sites them self, shared to externals. The queries are basically the same and you can extend them with additional keyword queries properties.
For example, search all Office 366 Groups external users can access:
ViewableByExternalUsers=true contentclass:sts_site WebTemplate:GROUP
(Because of security trimming in SharePoint Search the user who runs the query needs access to all Team Sites to gets an complete report.)
Of cause there are also options archiving this using PowerShell for Office 365 Groups or using Reports in the Office 365 Security & Compliance Center. Using the SharePoint Online search gives you the power and flexibility to integrate all managed properties as metadata in you report like for example ViewsLifeTime, LastModifiedTime, CreatedBy or ModifiedBy. In addition you can easily scope your report to only show documents using the IsDocument=true query parameter or to focus to special Site Templates like WebTemplate:GROUP to only show Office 365 Groups Team Sites etc.

Using PowerShell to get the report

Using PowerShell to get results from SharePoint Online Search also offers the option to save the report as an *.csv file. To call SharePoint Online Search API using PowerShell and save the result to an *.csv file you can follow the steps explained by Prasham Sabadra in his article Office 365/Sharepoint Online - PowerShell Script To Call Search API And Get The Result.
This example is based on his description. The report is showing all external shared content and sites in an Office 365 Tenant and is saving the result to C:\Temp\ViewableByExternalUsers.csv
# add references to SharePoint client assemblies and authenticate to Office 365 site - required for CSOM   
Add-Type -Path "C:\Program Files\Common Files\Microsoft Shared\Web Server Extensions\16\ISAPI\Microsoft.SharePoint.Client.dll"   
Add-Type -Path "C:\Program Files\Common Files\Microsoft Shared\Web Server Extensions\16\ISAPI\Microsoft.SharePoint.Client.Runtime.dll"   
Add-Type -Path "C:\Program Files\Common Files\Microsoft Shared\Web Server Extensions\16\ISAPI\Microsoft.SharePoint.Client.Search.dll"
#Specify tenant admin and URL 
$User = "Admin@yourTenant.onmicrosoft.com"   
#Configure Site URL and User 
$SiteURL = "https://yourTenant.sharepoint.com"  
#Password 
$Password ="yourPassword"   
$securePassword = ConvertTo-SecureString -String $Password -AsPlainText –Force  
$Creds = New-Object Microsoft.SharePoint.Client.SharePointOnlineCredentials($User,$securePassword)
#client context object and setting the credentials  
$Context = New-Object Microsoft.SharePoint.Client.ClientContext($SiteURL) 
$Context.Credentials = $Creds
#Calling Search API - Create the instance of KeywordQuery and set the properties 
$keywordQuery = New-Object Microsoft.SharePoint.Client.Search.Query.KeywordQuery($Context)  
#Sample Query - To get the last year result 
$queryText="ViewableByExternalUsers=true" 
$keywordQuery.QueryText = $queryText 
$keywordQuery.TrimDuplicates=$false 
$keywordQuery.SelectProperties.Add("LastModifiedTime") 
$keywordQuery.SelectProperties.Add("ViewsLifeTime") 
$keywordQuery.SelectProperties.Add("ModifiedBy") 
$keywordQuery.SelectProperties.Add("ViewsLifeTimeUniqueUsers") 
$keywordQuery.SelectProperties.Add("Created") 
$keywordQuery.SelectProperties.Add("CreatedBy") 
$keywordQuery.SortList.Add("ViewsLifeTime","Asc")
#Search API - Create the instance of SearchExecutor and get the result 
$searchExecutor = New-Object Microsoft.SharePoint.Client.Search.Query.SearchExecutor($Context) 
$results = $searchExecutor.ExecuteQuery($keywordQuery) 
$Context.ExecuteQuery() 
#Result Count 
Write-Host $results.Value[0].ResultRows.Count
#CSV file location, to store the result 
$exportlocation = "C:\Temp\ViewableByExternalUsers.csv" 
foreach($result in $results.Value[0].ResultRows) 
$outputline='"'+$result["Title"]+'"'+","+'"'+$result["Path"]+'"'+","+$result["ViewsLifeTime"]+","+$result["ViewsLifeTimeUniqueUsers"]+","+$result["CreatedBy"]+","+$result["Created"]+","+$result["ModifiedBy"]+","+$result["LastModifiedTime"] 
Add-Content $exportlocation $outputline  
}